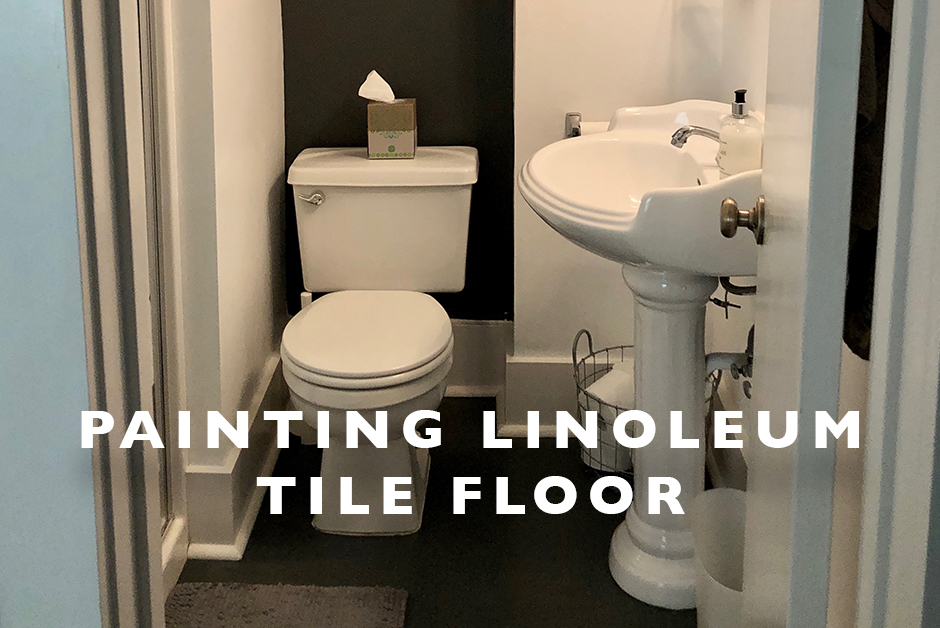
Over the past several months, I’ve had several people comment that they would love to see more content here on Land of Marvels about our home renovation, which in turn created this series for that specific purpose. As much as I love to travel, we aren’t doing a lot of that these days due to the COVID-19 pandemic, but I also do love being at home and as an Interior Designer in my day job, design and renovation are also a very big part of my life. If you’re not aware or don’t follow me on my personal Instagram (cmart1015), my husband Nick and I bought a 1925 Dutch Colonial house in SE Portland a year ago and we’ve been renovating it ever since. We’ve done a number of room renovations, but I’m also going to start sharing a few smaller DIY projects that we’ve had a lot of success with, today that DIY project I’m highlighting is: painting linoleum tile floor!
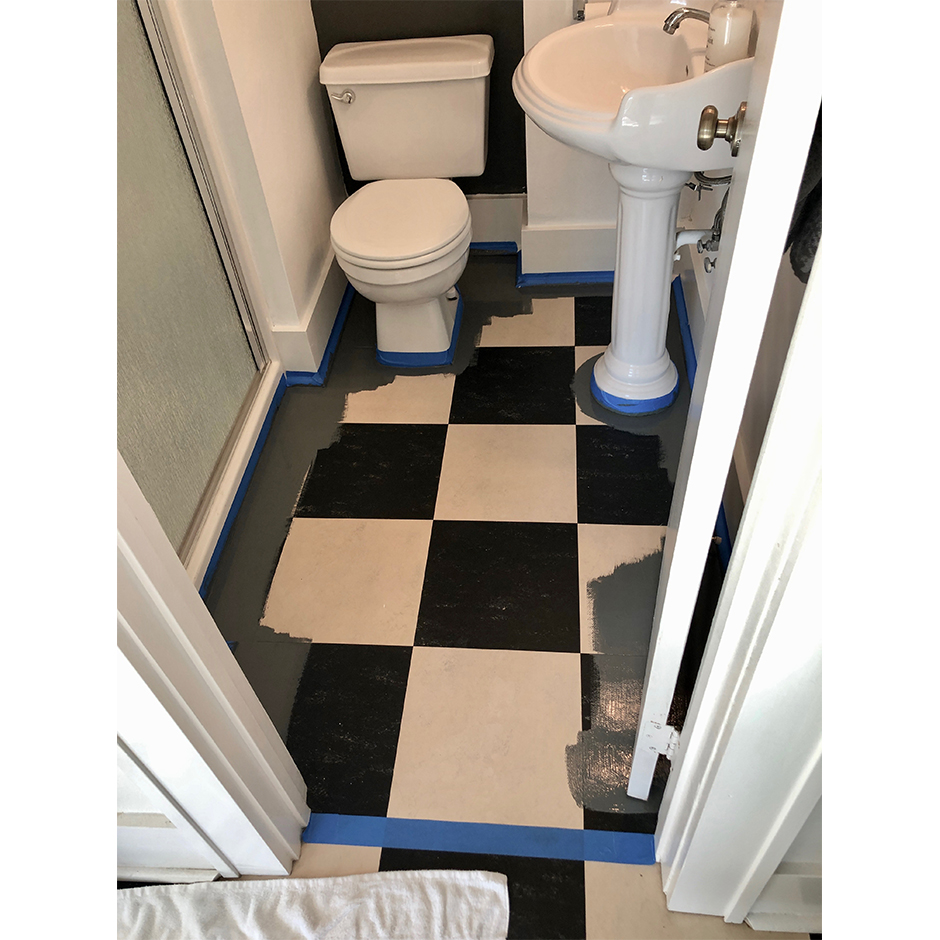
So to give you a sense of why I did this project, our downstairs bathroom is connected to the kitchen area and has the same linoleum tile flooring in both spaces. It’s a black and off-white (that’s more yellow-y in color) checkerboard linoleum tile that was probably installed less than 10 years ago. The tile itself is in decent shape, but the yellow tint in color in the tiles makes the whole space look dirty and I’m not a fan. In the 1.5 years we’ve been in the house, we’ve gotten quotes to redo the flooring in both the kitchen and bathroom and it’s going to be $3,000+ for whatever we choose to do due to the specifics of the space.
In an effort to save cost and to test out painting linoleum tile, I decided to do this project in the bathroom as it’s a tiny space and if it went well, we might end up painting the linoleum tile in the kitchen and breakfast nook as well. Long story short, this was a test project to try out painting linoleum tile and to see what it’s like before going on to do the whole space.
So you want to try painting linoleum tile in your own home? Here’s my step by step guide on how I did it!
Materials and Tools Needed:
- Rust Scat Paint – I found lots of people that had painted linoleum tiles online, but most involved having to do a sealant coat at the end. In an effort to cut down on steps, I found this paint that didn’t require that. I bought mine on Amazon with the custom color selection, message the seller and had them color match the paint to my specifications before shipping it to me.
- Painter’s Tape
- Old towels or plastic dropcloth
- Stir Stick
- Deep Floor Cleaner – This stuff is amazing! I ordered mine on Amazon and used it to deep clean the floor and it took everything up!
- Sponges – To use with the floor cleaner
- Paint Brush – This one is my fave!
- Paint Rollers
Step 1 – Do a Deep Clean + Tape
I started by getting on my hands and knees and doing a deep clean of the bathroom floor. I used this cleaner with these sponges and basically poured a little bit of the liquid on the floor and then used the sponges to get all dirt and grime up off the tiles. It was amazing (and gross) how much came up with this cleaner. I then used rags and paper towels to wipe up any remaining cleaner so that it was dry.
After the floor was completely dry, I used painter’s tape to tape off all the baseboards, around the base of the toilet and the base of the pedestal sink. Basically anything you don’t want painted, should get taped off. Spend the time doing this well and it will greatly reduce your time touching up later!
Step 2 – Stir the Paint Well and Use a Paint Brush to paint the Edges of the Floor in the Space
I made sure to stir the paint really well with a stir stick as well as shaking the can around a bit before opening it. Once it’s well mixed, you can get started. Start with a paint brush (this one if my absolute fave for all types of painting) and do a border coat of paint around the edges of the space. This is where you’ll want to make sure you taped really well and it will go super fast if you did. You just want to make sure you can’t see the tile below through the coat of paint, so make sure you’ll getting enough paint down to cover all the tile below.
Step 3 – Use a Roller to Paint the Remaining Floor Area
Using your roller kit, you can then paint the rest of the floor using a roller to go faster. You could just dump paint directly onto the floor in a larger space, then roll it. But for me, in a small space, I found it was easier to use a tray and roll it on from there. Again, just make sure you can’t see the color of the tile under the paint.
Step 4 – Let the Paint Sit Overnight, then Take the Tape off and Touch Up
I let the paint sit overnight before taking the tape off, just to make sure it settled all correctly. And then the following day when taking the tape off, walk on the floor in socks only, no shoes yet. It stayed fairly “tacky” in feeling for the first couple of days and felt sticky with shoes, so try to stay only in socks for the first couple days. I sat on the floor the following day after painting and did small minor touch ups with baseboard paint and floor paint after taking the tape off. Then let those touch ups sit for at least a few hours to dry.
Step 5 – Let the Paint Sit 2-3 Days Before Returning Heavy Items to the Floor
It took about 2-3 days after painting when I noticed the “tacky” feeling go away so I’d say to wait at least that amount of time before returning heavy items to the floor. As this is a bathroom, I only had small items like a trash can and a rug to place back so those were fine to replace the day after but any furniture, I’d recommend waiting at least 3 days to put it back.
Final Thoughts
The transformation of this space for only around $100 was truly incredible and I love how it turned out. I waited about a month a half after doing this project until posting this here on Land of Marvels because I wanted to let the paint sit and see how it was holding up before recommending this product. All in all, it still looks amazing even after walking on it for a month and a half now and I’m so happy with the transformation!
Tips:
- Open a window – this will allow for a quicker dry.
- Use a Small Paintbrush for Touch Ups – I use a tiny paint brush like these for touch ups to the baseboards or small areas on the floor that are hard to reach.
- Buy it on Amazon – I’ve included links throughout this post to buy all the supplies that I bought for this project. I did actually look at Home Depot and they don’t sell this particular paint, so Amazon was the easiest option! Plus the seller was super helpful and easy to work with to match the color I wanted, so I’d highly recommend using them.
*Just a note to say that these links I’m linking on this post are Amazon Affiliate links. I want to always be transparent when I do include affiliate links even though the products cost no different for you if you order through my links.


